NavList:
A Community Devoted to the Preservation and Practice of Celestial Navigation and Other Methods of Traditional Wayfinding


From: Art Leung
Date: 2021 Dec 6, 13:27 -0800
Hi Matt - I will attempt to describe my tripod/laser setup. I tend towards long long descriptions - I hope this does not bore you. Remember that, despite the excessive verbiage here, setting up a shot really only takes a minute or two once you go thru the process.
I also found using an artificial horizon to be difficult. I actually went as far as to purchase a front silvered mirror and mounted it to a base that I could level using a bullseye bubble level and screws and this worked ok-ish - I could get reasonable LOPs but never anything really really good. I am sure others can describe ways of making the artificial horizon work but I simply got tired of the limitations. This was where I started looking at laser levels.
The commonly found capenter's laser levels actually will work fairly well at projecting a level (or vertical) line automatically. The trick is aligning that line in a repeatable way to the sextant. This is where the tripods come in.
The things that I am using (you may find alternative ways!):
- a carpenter's laser level
- get one that is eye safe!
- get one with gimbal so it is self-leveling
- tripod mountable
- I find a green laser easier to see but red will also work
- two tripods - one for the laser level, one for the sextant
- the laser level tripod can be a lightweight/cheap one
- the sextant tripod will need to carry some weight without flexing so a sturdy one is in order
- a ball head that will let you rotate the ball 90° down
- see pictures for the rotation
- if the ball head comes with an ARCA clamp for the nodal rail, all the better
- a photographer's nodal rail for the ball head**
- a padded cradle for a sextant leg (to prevent scratching - not required, just handy)
- open sky and a hillside or home or something to project the laser onto
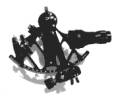
The first picture ("setup.jpg") shows the laser level on its tripod in the foreground and the tripod onto which the sextant will be placed in the background. The cardboard box around the laser level is there to be able to better control the laser light coming out of the level as my level projects close to 180° and it gets annoying after a while - the box just restricts the laser to shine only in the direction I want it to, with flaps to fine tune the width. In practice, I do not allow the laser to shine on the back of my head while I take the shot.
The next picture ("nodal rail marks") shows a closeup of the nodal rail with markings. Each of these marks is the reference line for a particular sextant: eg: C+P is for my Cassens and Plath and SNO is for my SNO-T. Each sextant you use will need its own reference line as the vertical height from leg to center of telescope is different across the makers.
The next picture ("sighting position") shows the nodal rail rotated so that the cradle is flat - this is the rotation by 90° I mentioned above. For the ball head, I can rotate the rail from the setup position to the flat position as shown. Because of the ball's geometry, the sighting position gives a repeatable position relative to the laser. The cradle is a padded fabric thing that is there just to keep leg controlled (ie: not falling off during the sight) while also not scratching the paint.
The first step, which need only be done once, is to align the laser to the nodal rail and sextant. To do this I:
- set up the tripods as seen in the "setup" picture
- rotate the nodal rail on the ball head to the "sighting position"
- set the sextant leg (I prefer the far one) onto the cradle
- then, center the laser line on the wall in the telescope view and hold the sextant in place
- then move your head and see where the laser line strikes the sextant
- adjust the laser tripod height so the laser line goes thru the center of the telescope eyepiece
- this may take a few tries
- then, without touching either tripod height, rotate the nodal rail vertical as seen in the "setup" picture and see where the laser strikes the nodal rail
- put a mark there - this is your reference line for that sextant
Now, wait for twilight!
I live in the hills and woods - I put my tripods in a wagon along with my sextant and other accoutrements. I look for a place under my target star or planet where I can shine the laser on to - it may be the side of my house, the slope of a hill, or the trees. I then set the laser tripod to shine there and then set the sextant tripod in between/to-one-side of the laser and the, say, hillside with the nodal rail in the vertical position. I will then set the leveled laser line on the reference line on the nodal rail (see "laser line3" for my setup for my C+P). Once set, I will then close the box flaps on the laser level so that the laser does not shine on the back of my head or the sextant (especially the horizon mirror!). To get the laser line directly under the target star, I set the laser level off to the side slightly so that it takes a path the side of me as I take the sight - if I were to set myself directly between the laser and the star, my fat head would prevent the laser line from being under the star and the laser light reflecting off the horizon mirror would make the sight impossible to take, thus make sure the laser does not shine on you or the sextant when taking the shot.
At this point, you set the sextant leg in the cradle and take the shot - the only difference is that instead of bringing it to a horizon, you are bringing it to a laser line. The normal techiques of nautical sextants apply - you will, for example, still want to rock the sextant to find the actual altitude just as you would with a real horizon.
Or course, if you are shooting properly spaced target stars, you will have to redo the tripod placement/alignment to get another backdrop for your laser and then place yourself in the right place to take the shot. In my normal spot, I do have to move around a bit to get the best placement of backdrop to star - as I have descending and open ground to the east, I typically do not take shots in that direction.
Do use your judgement about shining the laser at homes - most folks won't want to see a laser light shining thru their windows.
The usual warnings about shining laser light into your eyes do apply, of course.
For distances, I try and get at least about 20 yards/meters from the laser to the place it is shining on and maybe 2-3 yards from laser tripod to sextant tripod. You can likely do it with less distance but you'll want to experiment with it a bit as the geometry makes me think you will have some variability in DIP error at shorter distances - at around 20+ yards, there seems to be very little.
Depending on your laser, you may need to wait until late twilight to be able to see the laser line well. I find that with a basic sextant like a SNO-T, my laser line shows up well early in twilight - if you have a horizon prism doohicky like a fancy C+P, and you insist on using it, you may have to wait for it to get darker.
**Alternatives to ball head and nodal rail are obviously possible - the thing you are trying to get is consistent alignment between the sextant and the laser. I just happened to have the ball head and a nodal rail from a different project - a vertical stick on the top of your tripod at a consistent height to where you place your tripod leg would also do.
First time out, I will take a few shots and reduce them with DIP correction at 0. If I do my job correctly, all the shots will show a pretty consistent error of a small number of minutes. That then becomes the DIP correction for that mark on the rail and I find that DIP correction does not wander from day to day. Note - I also average 4-6 consecutive shots to get rid of any single-shot mulligans which makes converging on a correction very quick.
I usually get very good fixes with this setup, frequently getting asterisks thru my actual position.
I apologize for the long post but I hope this helps!. It really is fairly fast to set up and take a shot.
For full disclosure, most of the time I use a Kollsman periscopic sextant. No lasers and no target bearing restrictions. But, every so often, I still run with a nautical sextant for the practice.
-- Art